If you’re anything like me, you crave a dessert that feels like a special occasion yet is totally doable whenever the craving hits. These Gluten Free Tiramisu Brownies hit that sweet spot perfectly. I remember the first time I made them for a cozy dinner party—it was a total crowd-pleaser. The rich chocolate scent wafting from the oven mixed with the creamy mascarpone topping was irresistible. Everyone was asking for the recipe, and I just couldn’t wait to make them again. What’s not to love when you get fudgy, chocolatey brownies with that classic tiramisu cream on top? It’s like dessert magic in one pan.
Why This Recipe Shines
- Flavor Harmony: That perfect balance of deep chocolate and smooth mascarpone cream creates a dessert that’s rich yet fresh.
- Easy Assembly: No complicated layers—just a fudgy base topped with luscious tiramisu cream you can whip up in minutes.
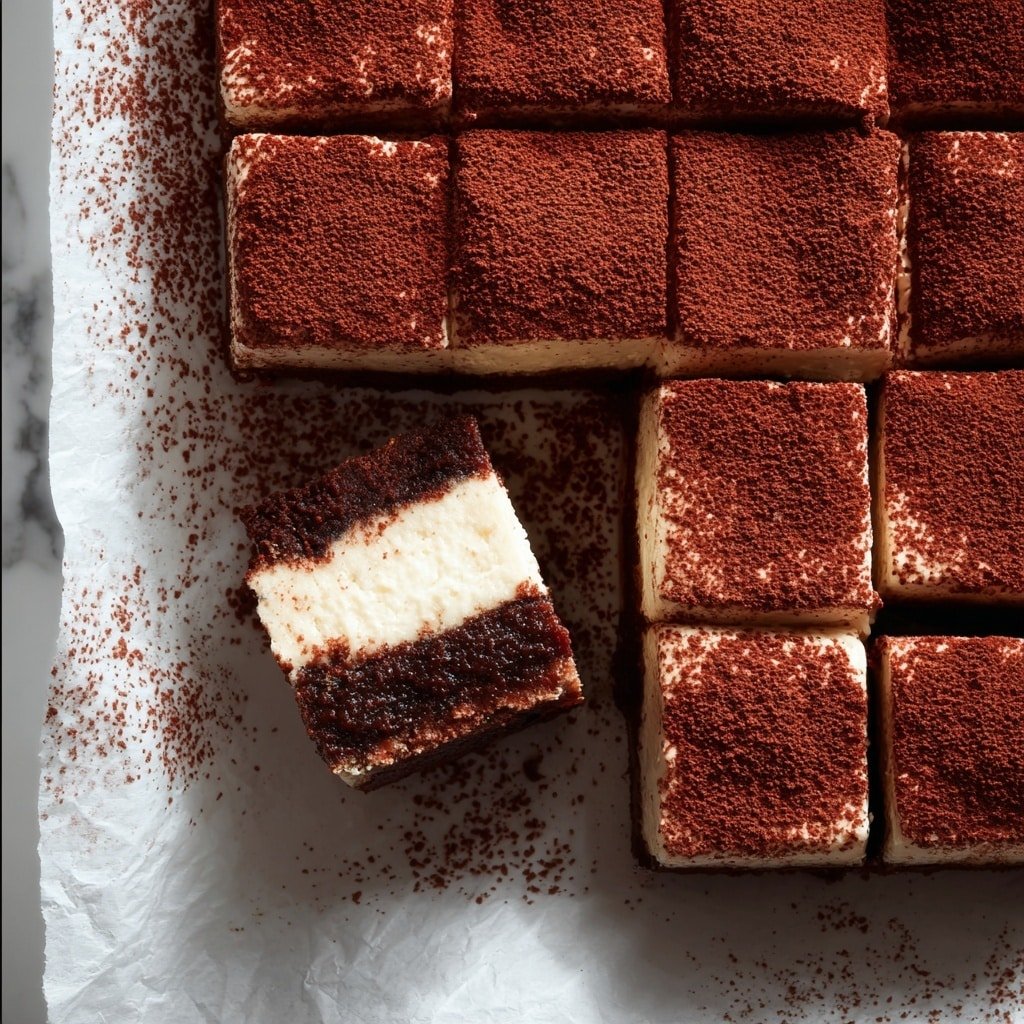
- Texture Play: The dense brownie meets light, airy whipped cream—each bite has a delightful contrast.
- Showstopper Finish: Dusting with cocoa powder gives a classic tiramisu look that’s elegant and inviting.
This Gluten Free Tiramisu Brownies recipe is a gem whether you’re new to gluten-free baking or a seasoned pro. The ingredients are straightforward, and I’ll walk you through every step so you’ll get that smooth tiramisu topping without any lumps and brownies that come out perfectly fudgy without crumbling. Plus, it’s flexible enough for you to tweak and add your own twist—an extra shot of espresso, a sprinkle of chopped nuts, whatever you like. Ready? Let’s dive in and make your kitchen smell heavenly!
Ingredients You’ll Be Working With
Before you get started, make sure to measure each ingredient carefully—especially the gluten-free flour and cocoa powder for that perfect fudgy texture. Don’t worry, I’ve got the exact amounts listed in the recipe card at the bottom.
- Gluten free all-purpose flour: Provides structure—ensure it contains xanthan gum or add some for best results.
- Cocoa powder: Adds deep chocolate flavor; unsweetened is best for balance.
- Espresso powder: Intensifies chocolate notes—you can substitute instant coffee granules.
- Sugar: Sweetens and helps with moisture.
- Eggs: Binds the batter; room temperature eggs mix better.
- Melted butter: Gives richness and fudginess.
- Vanilla extract: Rounds out the flavors, use pure extract if possible.
- Mascarpone cheese: The heart of tiramisu cream, make sure it’s fresh and room temp for smoothness.
- Heavy whipping cream: Whipped to soft peaks to create lightness in the cream layer.
- Powdered sugar: Sweetens the tiramisu topping without graininess.
- Brewed espresso or strong coffee: Adds authentic tiramisu flavor; cooled to avoid melting the cream.
- Unsweetened cocoa powder: For dusting the finished brownies to give that classic tiramisu look.
If you need to make substitutions, almond milk can replace heavy cream in a pinch (though texture will be slightly lighter), and dark chocolate pieces folded into the batter add a nice twist.
Chef’s Note
You’ll find the complete list of ingredients with exact measurements in the printable recipe card at the bottom of this post.
Tools You’ll Need
- 8×8 inch baking pan: Perfect size for brownies to bake evenly.
- Parchment paper: Makes removing brownies a breeze without sticking.
- Mixing bowls: Separate bowls keep wet and dry ingredients tidy.
- Electric mixer or whisk: Helps whip cream to soft peaks effortlessly.
- Measuring cups and spoons: Accuracy here makes all the difference.
- Spatula: For folding in ingredients gently without deflating the cream.
- Sifter or fine mesh sieve: Best for dusting cocoa powder evenly on top.
How to Make Gluten Free Tiramisu Brownies Recipe
Let’s get your oven warmed up and your ingredients ready—making these brownies is pretty straightforward, but a few little tips along the way will make your results perfect.
- Preheat and prep your pan: Set your oven to 350°F (175°C) and line an 8×8 pan with parchment paper. This prep step ensures your brownies bake evenly and lift out cleanly.
- Mix the wet ingredients: In a large bowl, combine melted butter, sugar, eggs, and vanilla extract until smooth. Use room-temp eggs here—they blend better and give a silky batter.
- Whisk dry ingredients: In a separate bowl, sift together gluten free flour, cocoa powder, and espresso powder. Sifting helps avoid lumps and evenly distributes the espresso flavor.
- Combine wet and dry: Gradually add dry ingredients to the wet, mixing until thick and smooth. Take care not to overmix—it’ll make brownies tough.
- Bake the brownies: Pour the batter into your prepared pan and smooth the top with a spatula. Bake for 20–25 minutes. You’re looking for a set top that springs back lightly—not fully firm—and a toothpick with a few moist crumbs. Overbaking dries them out.
- Cool completely: Let the brownies cool fully in the pan on a wire rack. This is key because the tiramisu cream layer needs a chilled, firm base.
- Make the tiramisu cream: Beat the mascarpone and powdered sugar with vanilla until creamy and smooth. In a separate bowl, whip heavy cream to stiff peaks, then gently fold it into the mascarpone mixture. Add the cooled brewed espresso slowly and fold lightly to keep it airy.
- Assemble and chill: Spread the tiramisu cream evenly over the cooled brownies. Cover and chill at least 2 hours to let the flavors marry and the cream set.
- Finish with cocoa dusting: Just before serving, dust unsweetened cocoa powder over the top with a sifter for a beautiful, classic tiramisu finish.
- Slice and serve chilled: Cut into 9 generous squares and enjoy that perfect meld of fudgy brownies and silky tiramisu cream.
Kitchen Wisdom
- Tip 1: Use room temperature mascarpone and eggs for a smoother batter and cream.
- Tip 2: Don’t skip chilling the brownies first—it keeps the tiramisu layer intact and the flavors balanced.
- Tip 3: Gently fold the whipped cream to keep the topping light and airy, don’t overmix.
- Tip 4: For stronger coffee flavor, brush the cooled brownies lightly with espresso before adding the tiramisu layer.
How to Serve
Flavor Boosters
Try sprinkling shaved dark chocolate or chocolate-covered espresso beans over the cocoa dusting for an extra chocolate kick. A hint of cinnamon dusted on top can add warmth and depth, too.
Perfect Pairings
These Gluten Free Tiramisu Brownies go wonderfully with an espresso or cappuccino for an authentic Italian touch. For a boozy twist, serve alongside a glass of amaretto or coffee liqueur.
Presentation Touches
Slice into neat squares using a sharp knife wiped clean between cuts for tidy edges. Arrange on a pretty platter with fresh berries or mint leaves for gatherings. Wrapped in parchment and tied with a ribbon, these brownies make thoughtful homemade gifts.
Variations & Easy Swaps
- Use coconut cream instead of heavy cream for a dairy-free tiramisu layer.
- Add a tablespoon of coffee liqueur to the tiramisu cream for extra boozy flavor.
- Swap gluten free flour blend for almond flour to add a nutty twist (expect a denser texture).
- Fold in ½ cup mini chocolate chips or chopped nuts into the brownie batter.
- For a lighter option, replace half the butter with unsweetened applesauce.
Make-Ahead, Storage & Reheating
- Make the brownies a day ahead and store covered in the fridge after assembling for best flavor melding.
- Keep leftovers airtight in the fridge up to 4 days to maintain freshness of the tiramisu topping.
- Serve chilled or at room temperature, but avoid microwaving as it will melt the cream layer.
- Freeze unassembled fudgy brownies for up to 2 months; thaw completely before adding tiramisu cream.
FAQs
- Can I use regular flour instead of gluten free? Yes, but the texture may be slightly different. If you’re not avoiding gluten, all-purpose flour works fine.
- How do I know when the brownies are done? Look for edges pulling away slightly and a toothpick with moist crumbs—not wet batter.
- Can I prepare the tiramisu cream in advance? You can whip it a few hours ahead; keep covered and chilled. Just fold in espresso right before spreading.
- What if I don’t have mascarpone? Cream cheese mixed with a bit of heavy cream can work in a pinch, but mascarpone gives the authentic smoothness.
- Is it okay to use decaf espresso powder? Absolutely! It won’t affect texture, just the caffeine content.
Gluten Free Tiramisu Brownies Recipe

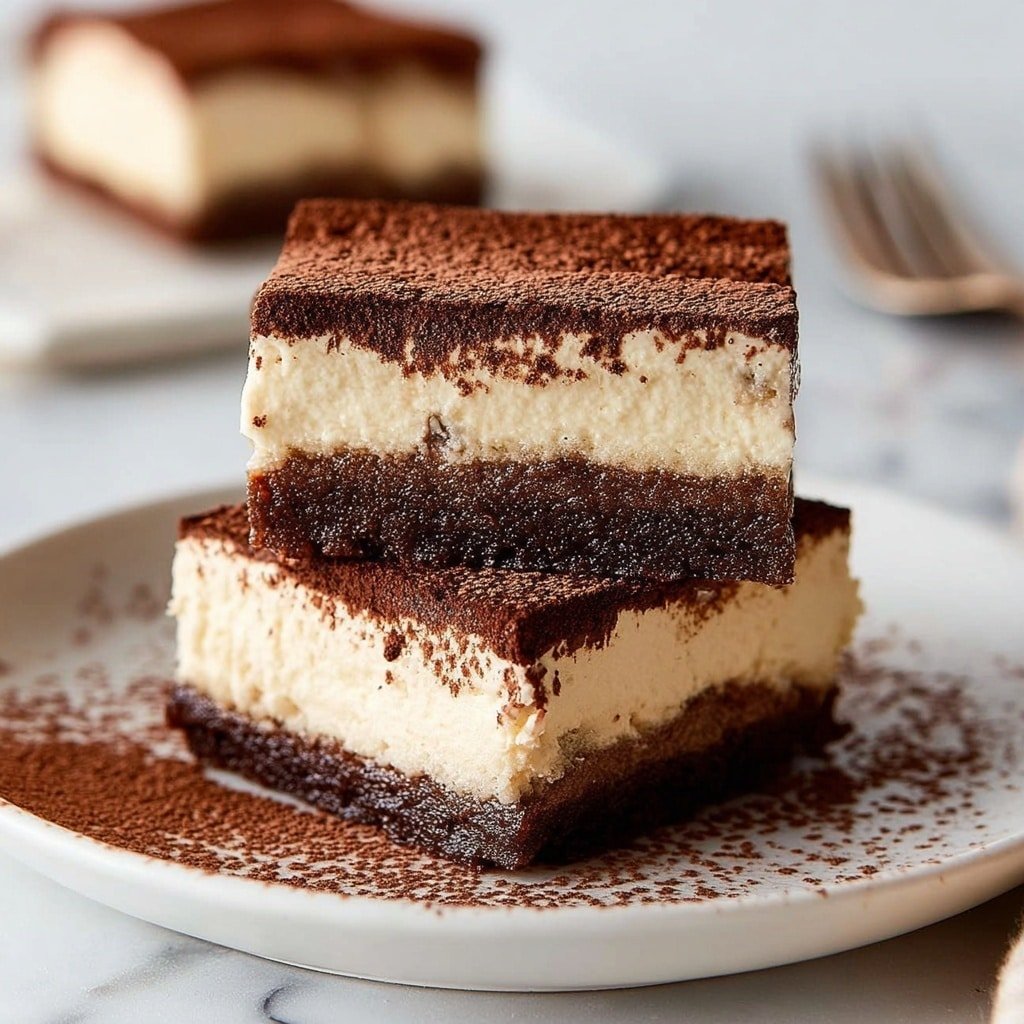
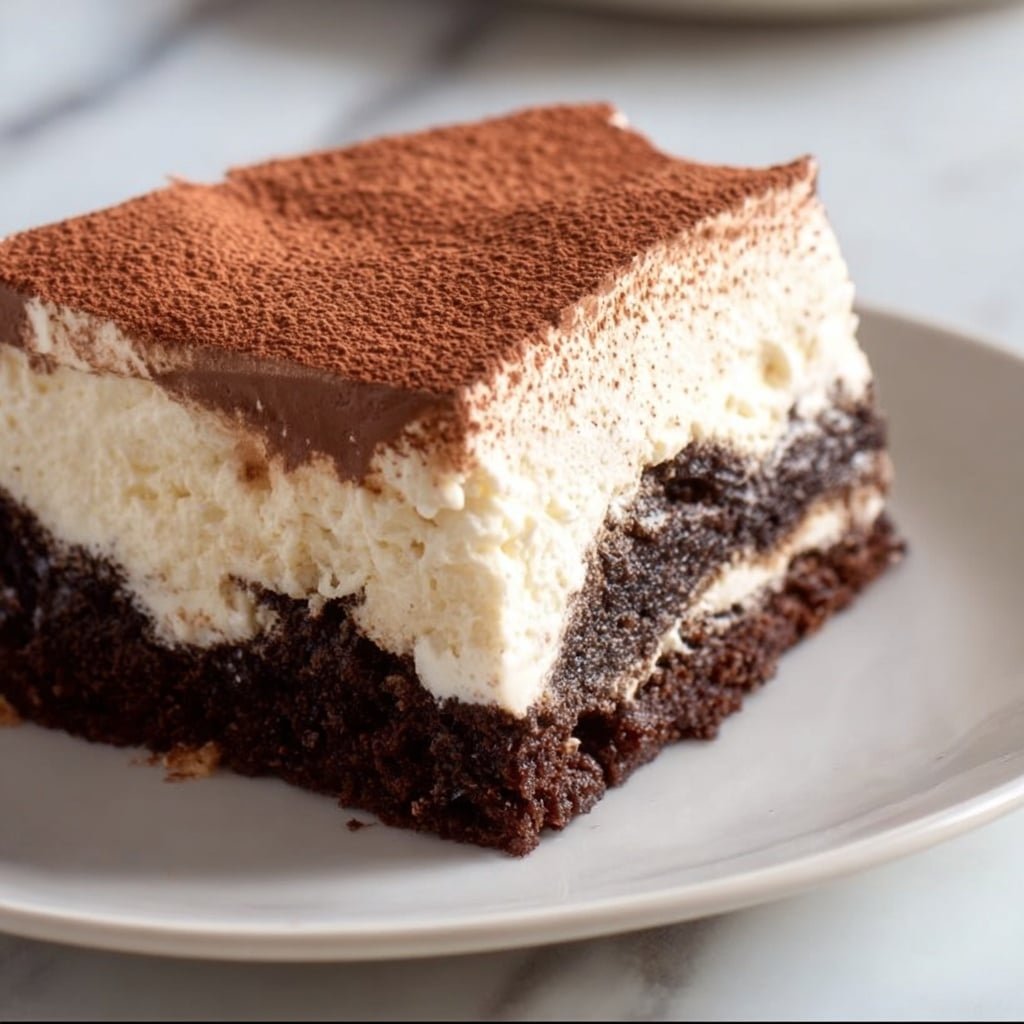
These Gluten Free Tiramisu Brownies are a delightful fusion dessert combining a rich, fudgy chocolate brownie base with a light and creamy tiramisu topping. Finished with a dusting of cocoa powder and chilled to perfection, they offer an elegant twist on traditional favorites, perfect for gluten-free dessert lovers.
- Prep Time: 25 minutes
- Cook Time: 25 minutes
- Total Time: 2 hours 15 minutes
- Yield: 9 brownies
- Category: Dessert
- Method: Baking
- Cuisine: Fusion
- Diet: Gluten Free
Ingredients
Brownie Base
- 1/2 cup gluten free all-purpose flour
- 1/3 cup cocoa powder
- 1 tablespoon espresso powder
- 1 cup sugar
- 2 large eggs
- 1/2 cup melted butter
- 1 teaspoon vanilla extract
Tiramisu Topping
- 1 cup mascarpone cheese
- 3/4 cup heavy whipping cream
- 1/3 cup powdered sugar
- 1/4 cup brewed espresso or strong coffee, cooled
- Unsweetened cocoa powder (for dusting)
Instructions
- Preheat the oven: Preheat your oven to 350°F (175°C) and line an 8×8 inch baking pan with parchment paper for easy removal.
- Mix wet ingredients: In a bowl, combine the melted butter, sugar, eggs, and vanilla extract, mixing until smooth and well incorporated.
- Combine dry ingredients: In a separate bowl, whisk together the gluten free flour, cocoa powder, and espresso powder to evenly distribute the espresso flavor.
- Form brownie batter: Gradually add the dry ingredients into the wet mixture, stirring until a thick, consistent batter forms without lumps.
- Bake the brownies: Pour the batter into the prepared pan, smoothing the top with a spatula. Bake for 20 to 25 minutes until just set but still moist inside. Let cool completely before proceeding.
- Prepare mascarpone cream: In a separate bowl, beat the mascarpone cheese with powdered sugar and vanilla extract until smooth and creamy.
- Whip the cream: In another clean bowl, whip the heavy whipping cream to stiff peaks, then gently fold it into the mascarpone mixture to create a light, airy topping.
- Add coffee flavor: Fold in the brewed espresso or strong coffee into the cream mixture evenly, blending the tiramisu flavors.
- Assemble the brownies: Spread the tiramisu cream evenly over the completely cooled brownie base, smoothing the top.
- Chill: Refrigerate the assembled brownies for at least 2 hours to allow flavors to meld and the topping to firm up.
- Finish and serve: Dust the chilled tiramisu-topped brownies with unsweetened cocoa powder, slice into 9 squares, and serve chilled for best taste and texture.
Notes
- Ensure the brownies are fully cooled before adding the tiramisu layer to prevent melting the cream.
- Use room temperature mascarpone for a lump-free, smooth cream layer.
- Store leftovers in an airtight container in the refrigerator for up to 4 days to maintain freshness.